As responsible device users, it’s crucial to regularly clear the cache to safeguard against malware and enhance performance. While we often remember to clear cookies and cache on our computer browsers and phones, we tend to overlook this practice for our Samsung Smart TVs.
Failing to clear the cache regularly can result in a lack of memory on your Samsung smart TV, impacting its overall performance.
In addition to clearing the cache, you can also take the opportunity to evaluate and delete unused apps. This not only frees up valuable storage space but also ensures a streamlined user experience on your Smart TV.
In this article, I will guide you through a step-by-step procedure for clearing the cache on your Samsung TV, empowering you to optimize its performance and enjoy a seamless entertainment experience.
What is cache storage on your Smart TV?
When it comes to features and performance, Samsung Smart TVs are an excellent choice. Like any smart device, they maintain a cache—a storage area that stores temporary files, images, and other relevant data. This cache plays a crucial role in speeding up app performance by retrieving data more quickly.
However, as the cache size increases, it can potentially impact the speed and overall performance of the running apps. To ensure the smooth operation of your Samsung Smart TV, it is highly recommended to regularly clear the device’s cache.
By clearing the cache, you can optimize the performance of your Samsung Smart TV and ensure that apps run smoothly without any sluggishness. In the following steps, we will guide you through the process of clearing the cache on your Samsung Smart TV.
Why is Clearing Your TV Cache Vital?
Clearing the cache of your Samsung Smart TV offers numerous advantages that enhance your viewing experience and device performance. Let’s explore these benefits:
- Increased Speed: Failure to clear the cache of your TV can potentially impact its speed. By regularly clearing the cache, you ensure optimal performance and a smoother user interface.
- Protection from Malware: Clearing the cache of your Smart TV serves as a protective measure against viruses and malware. By removing accumulated data, you reduce the risk of malicious content affecting your device.
- Improved Performance: Over time, the cache can accumulate unnecessary data that can hinder the proper functioning of certain websites or apps. Clearing the cache resolves these issues, ensuring that websites and apps work flawlessly on your Smart TV.
- Free Up Space: Smart TVs come equipped with exciting features, but they require ample space to function effectively. Clearing the cache frees up valuable storage space, allowing you to install new apps and enjoy the full capabilities of your Smart TV.
How to Clear Cache on Samsung Smart TV: Different Methods for Various Models
Over time, cookies and extensive browsing data can accumulate on your Samsung TV, potentially impacting your browsing experience. However, clearing the cache on Samsung TVs can be a bit complex, as the method varies depending on the model.
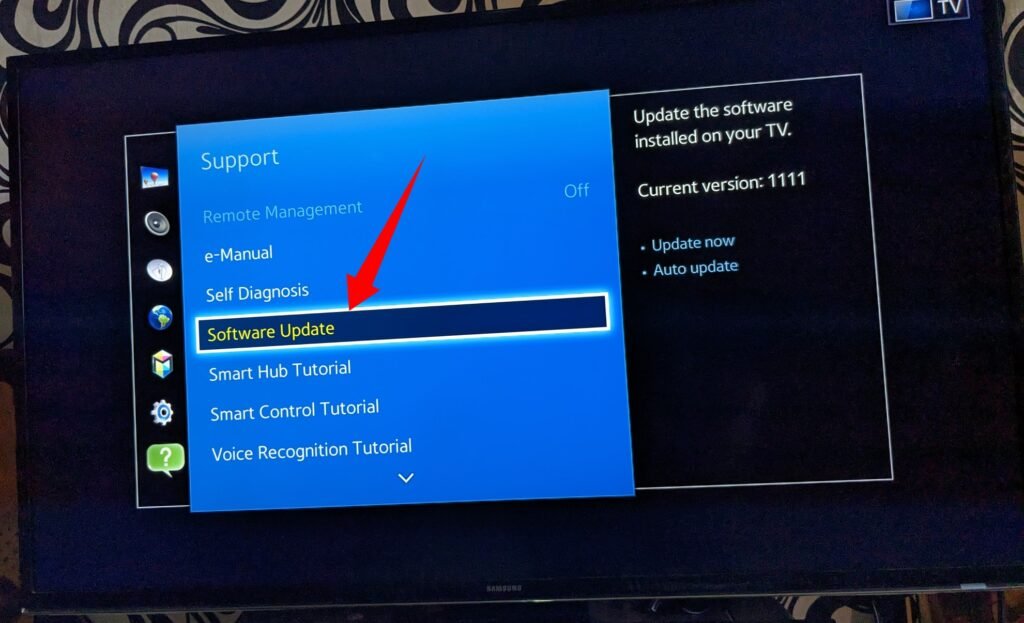
Method 1: 2020 and Above Models
For Samsung TVs released in 2020 and newer, you can utilize the Device Care feature to clean the TV’s memory. Follow these steps:
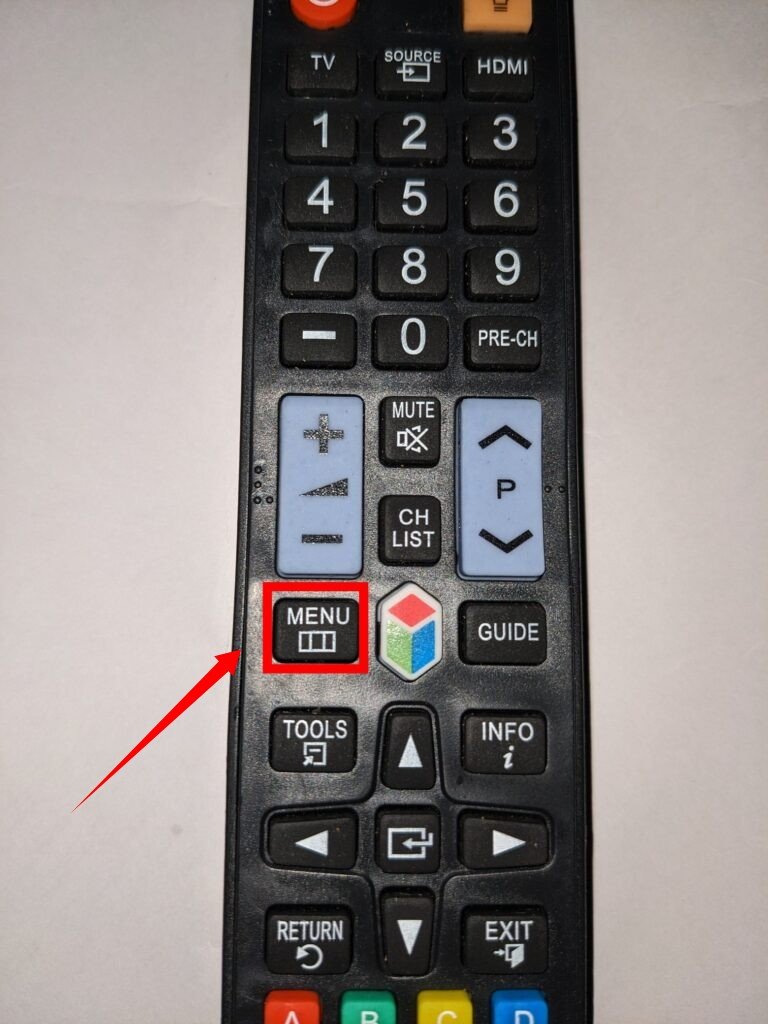
- Using your TV remote, navigate to the Home screen.
- Select Settings from the menu.
- Go to Support and then choose Device Care.
- Select Start Device Care to initiate the cache clearing process.
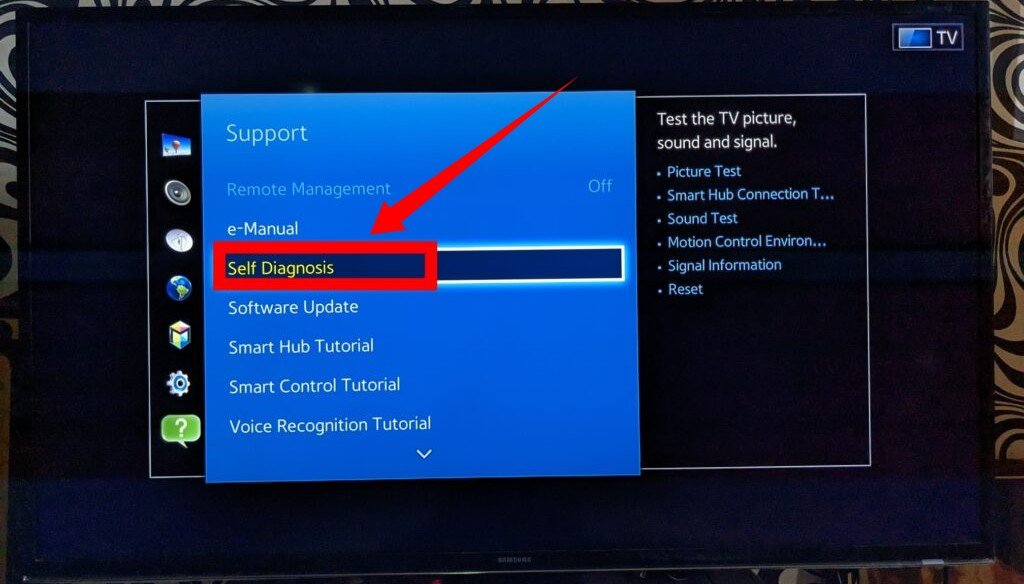
Method 2: 2019 Samsung TVs
If you own a Samsung TV from 2019, you can utilize the TV Device Manager to clear the device cache and free up memory. Here’s how:
- Using your TV remote, access the Home screen.
- Select Settings from the menu.
- Go to Support and then choose Self Diagnosis.

- From there, select TV Device Manager.
Please note that these methods are specific to the mentioned models. For other Samsung TV models, the cache clearing process may differ. It’s always a good idea to consult the user manual or contact Samsung support for model-specific instructions.
Clearing the Cache on Various Samsung TV Models: Methods 3, 4, and 5
Method 3: 7 Series
- Access the Settings menu on your Samsung TV.
- Select Support from the options.
- Choose Self Diagnosis.
- Click on TV Device Manager.
- On the screen that appears, you’ll find options such as Memory Boost, Clean Running Apps, and Manage Storage. Select the desired option to clear the cache.
Method 4:
- Navigate to Smart Hub on your Samsung TV.
- Click on Settings.
- Go to Support.
- Choose Self Diagnosis.
- Select Reset Smart Hub.
Method 5:
- Turn off your Samsung TV.
- Turn it back on and hold the power button for approximately 20 seconds.
- Release the power button, and the TV cache will be cleared.
For Other Models:
Before proceeding with cache clearing on other Samsung TV models, follow these prerequisites:
- Ensure that the TV Mode or HDMI input mode is active before accessing the TV settings.
- Keep in mind that the following steps will delete cached media and clear cookies but won’t affect Bookmarks and History.
Method 6: Clearing the Cache on TU/Q/LS Model Samsung TVs: Step-by-Step Guide
If you own a TU/Q/LS Model Samsung TV, you can follow these simple steps to clear the cache:
- Using your TV remote control, navigate to the Home menu.
- From the Home menu, select Settings.
- Look for the Broadcasting tab. Note that you may need to choose “TV” as your input source to access this tab.
- Within the Broadcasting settings, locate and select Expert Settings.
- In the Expert Settings menu, find and click on HbbTV Settings.
- Within the HbbTV Settings, you will find the option to Delete browsing data.
- Click on Delete browsing data, and a confirmation popup will appear.
- Confirm the deletion by clicking on Delete, and the cache on your Samsung TV will be cleared.
Method 7: Clearing the Cache on MU/M/NU/RU/Q and Frame Model Samsung TVs: Step-by-Step Guide
To clear the cache on MU/M/NU/RU/Q and Frame Model Samsung TVs, you can follow the steps mentioned earlier. However, if you encounter that the Expert Settings option is disabled, you can try the following alternative:
- Using your TV remote control, switch the source to Live TV.
- Once on Live TV, navigate to the Home menu.
- Proceed to Settings.
- Look for the Broadcasting tab.
- Select Expert Settings from the list of options.
- In the Expert Settings menu, you should now be able to access the HbbTV Settings.
- Click on HbbTV Settings to continue.
- Locate the option to Delete browsing data.
- Select Delete browsing data, and a confirmation popup will appear.
- Confirm the deletion by clicking on Delete.
- After deleting the cookies, a success popup notification will appear.
Method 8: Clearing the Cache on K/KU/KS Smart TV Models: Step-by-Step Guide
If you have a K/KU/KS Smart TV model, you can follow these steps to clear the cache:
- Use your remote control to press the Home button.
- In the window that appears, navigate to Settings.
- Look for the Broadcasting tab and select Expert Settings.
- Within Expert Settings, choose HbbTV Settings.
- Click on Delete browsing data.
- A confirmation box will appear, asking if you want to delete the device cookies.
- Select the Yes option to proceed with clearing the cache.
- Wait for a few minutes while the device cache is cleared.
Method 9: Clearing the Cache on J/JU/JS Model Samsung TVs: Step-by-Step Guide
To clear the cache on J/JU/JS Model Samsung TVs, you can follow these steps:
- Open the web browser app on your TV.
- Look for the Menu button at the top right corner of the app and click on it.
- In the menu that appears, locate and select the Settings button.
- From the Settings menu, choose Privacy & Security.
- Within the Privacy & Security settings, find and click on Delete Browsing Data.
- A confirmation prompt will appear, asking if you want to clear the cache and cookies.
- Confirm the action by clicking on Yes.
- Wait for the cache and cookies to be cleared.
If Samsung Cache Clearing Fails…
Resetting Your Television: Step-by-Step Guide
If you are considering resetting your television, please note that this action will erase all data on your device, including the device’s memory. To reset your TV, follow these steps:
- Navigate to the Settings menu on your TV.

- Look for the Support option and select it.
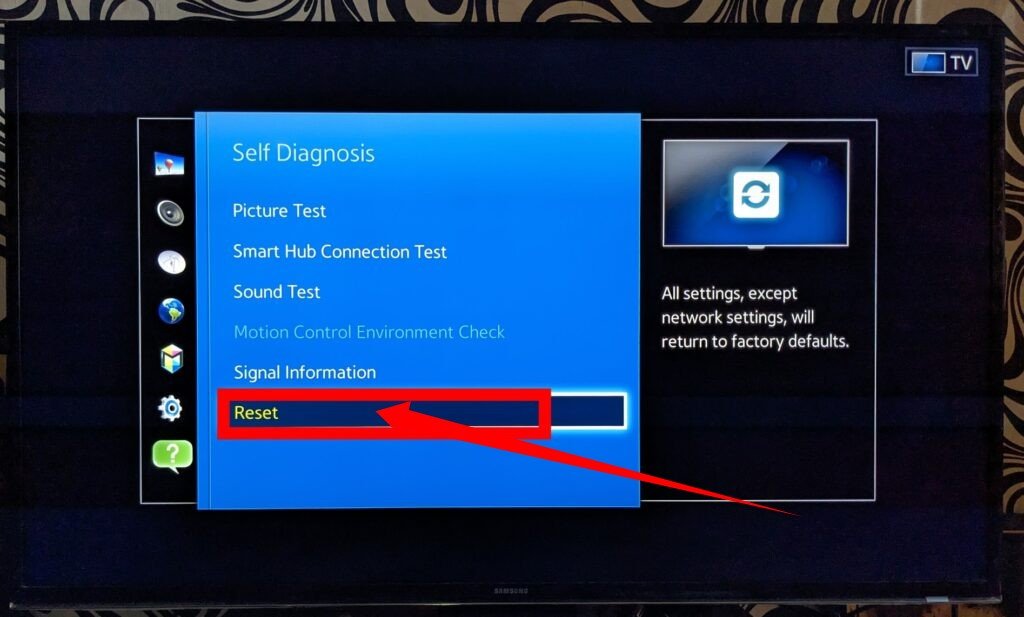
- Within the Support menu, find and choose Self Diagnosis.
- Look for the Reset option and select it.
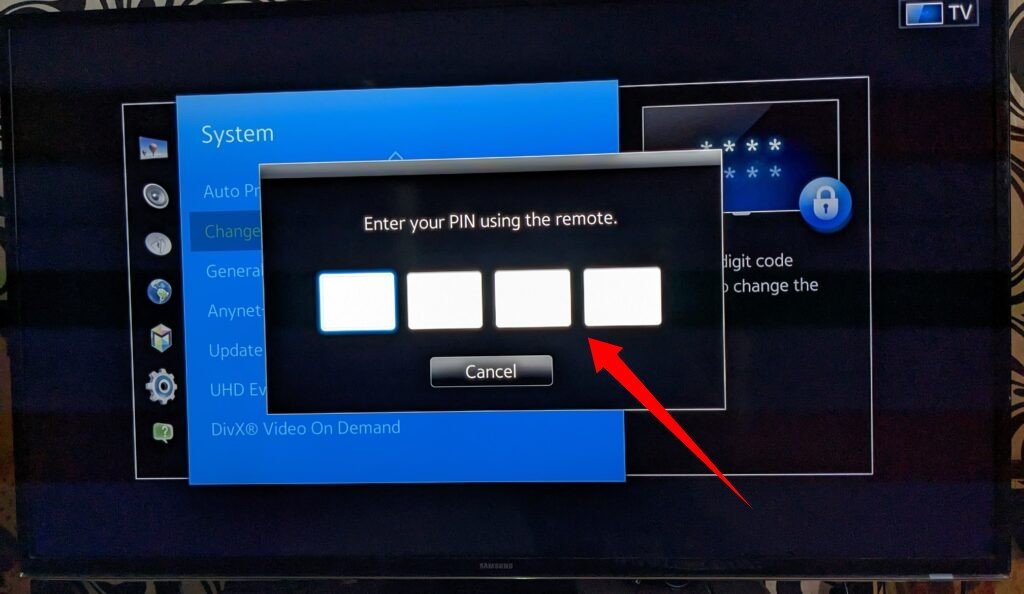
- A prompt will appear asking for your PIN. By default, the PIN is set as 0000. Enter the PIN using your remote control.
- Confirm the reset action by following the on-screen instructions.
Please keep in mind that performing a reset will erase all data on your television and restore it to its original factory settings. Ensure you have backed up any important data or settings before proceeding with the reset.
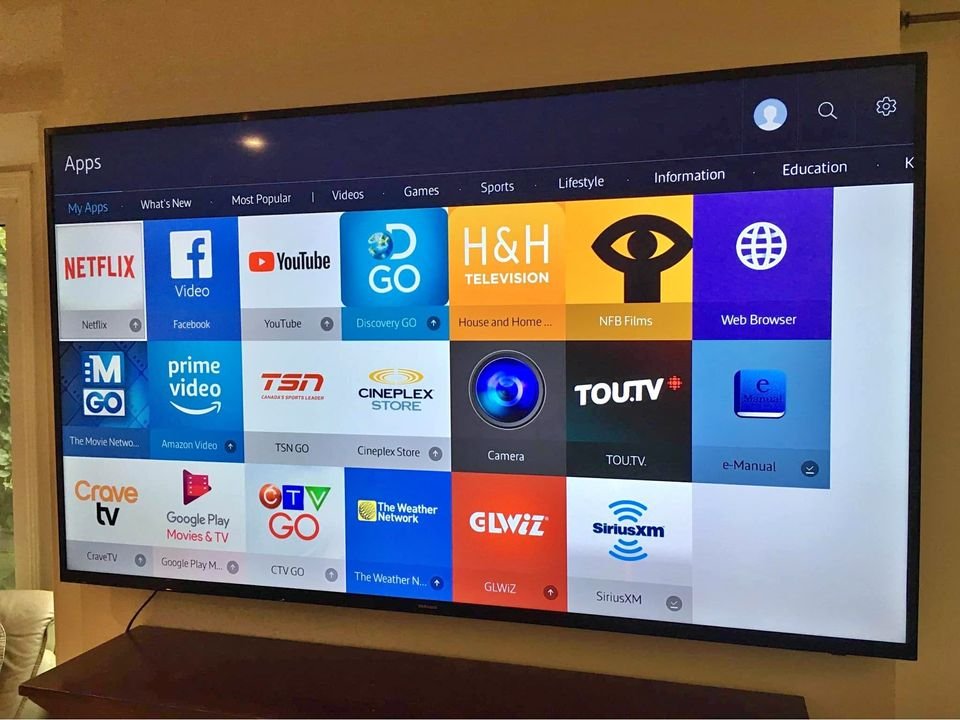
Clear Cache of An App On Samsung Smart TV
Clearing App Cache on Samsung Smart TVs: Step-by-Step Guide
To clear the cached data for a specific app on your Samsung Smart TV, you can follow these steps:
- Using your TV remote control, press the Home icon.
- Open the Settings tab and select Apps.
- From the list of apps, choose the one for which you want to clear the cache.
- Once you’ve selected the app, click on the Clear cache button.
- A confirmation popup will appear on the screen.
- Proceed by selecting the Yes button to confirm clearing the app’s cache.
- The cache for the chosen app will be cleared.
Alternatively, if clearing the cache doesn’t resolve the issues with the app, you can try reinstalling the app. This can often fix most app glitches on Samsung Smart TVs.
Please note that clearing the cache or reinstalling the app might take a few minutes to complete. These steps will help you eliminate unwanted cache and ensure the smooth functioning of the selected app on your Samsung Smart TV.