
Getting local channels on your Samsung TV is not as daunting as it may seem. I understand that it can be challenging, but it’s definitely not impossible.
In this article, I will guide you through the various methods to install local channels on your Samsung TV and ensure that you do it correctly. I will also provide troubleshooting tips to help you overcome any issues you may encounter along the way.
One option to access local channels on your Samsung TV is by using an antenna. Typically, outdoor antennas work best in this case. You can easily find supported antennas online that will be helpful in picking up local channels effectively.
Moreover, if you own a smart TV, you have the advantage of downloading apps that provide free local channels in high definition and quality, eliminating the need for an antenna or cable.
So, without wasting any more time, let’s explore the different ways to get local channels on your Samsung TV and make the most out of your viewing experience.
Ways to Get Local Channels on Samsung TVs
1. Use an Antenna
As mentioned earlier, if you do not have a Samsung smart TV, using an antenna or cable is the only viable option to access local channels. In case your antenna is faulty, here are some handy tips on creating a TV antenna using a coaxial cable.
It is important to ensure that you have an antenna that is compatible with your Samsung TV. The price range for antennas designed for local channels typically falls between $20 to $30.
However, it is worth noting that there may be some minor challenges when setting up an antenna, particularly when it is placed outdoors.
If your antenna is obstructed by taller buildings or if you are experiencing unfavorable weather conditions, there is a possibility that your broadcast signal may be inconsistent. These factors can affect the quality and reliability of the local channels you receive on your Samsung TV.
2. Use a Coaxial Cable
The coaxial cable is renowned for its ability to transmit high-frequency signals effectively.
When setting up your antenna, the installation process is straightforward. Simply plug the coaxial cable into the antenna jack located at the back of your Samsung TV.
Ways to Get Local Channels on Samsung Smart TVs
1. Download TV Applications
Samsung smart TVs offer the convenience of downloading certain applications to access local channels directly.
With these applications, you can enjoy free access to high-quality local channels without the need for an antenna or cable.
Here are the top three recommended applications to download:
- Locast
- Pluto TV
- Xumo: free movies & TV
You can find these applications in the dedicated application store, typically located under the Smart TV section of your Samsung TV.
Ensure that your Samsung smart TV is connected to your Wi-Fi network in order to download these apps successfully.
Once downloaded, feel free to explore and try out the different applications to find the one that suits your preferences best.
Additionally, it’s worth noting that you can still use an antenna cable even if you have a Samsung smart TV, providing you with even more options for accessing local channels.
2. Stream Social Media
Another option to consider is streaming live feeds from social media platforms directly on your Samsung Smart TV.
To begin watching live TV, navigate to the home display screen and select the ribbon menu.
From there, you can access the guide for current programming, which allows you to customize and personalize your channel selection according to your preferences.
3. Subscribe for Cable TV
By subscribing to a cable TV service, you can enjoy the benefit of a stable and reliable signal, eliminating the concern of inconsistent reception often associated with antennas.
However, it is important to note that the cost of a cable TV subscription can be a significant drawback for some.
To install local channels on your Samsung TV using a cable TV connection, follow these steps:
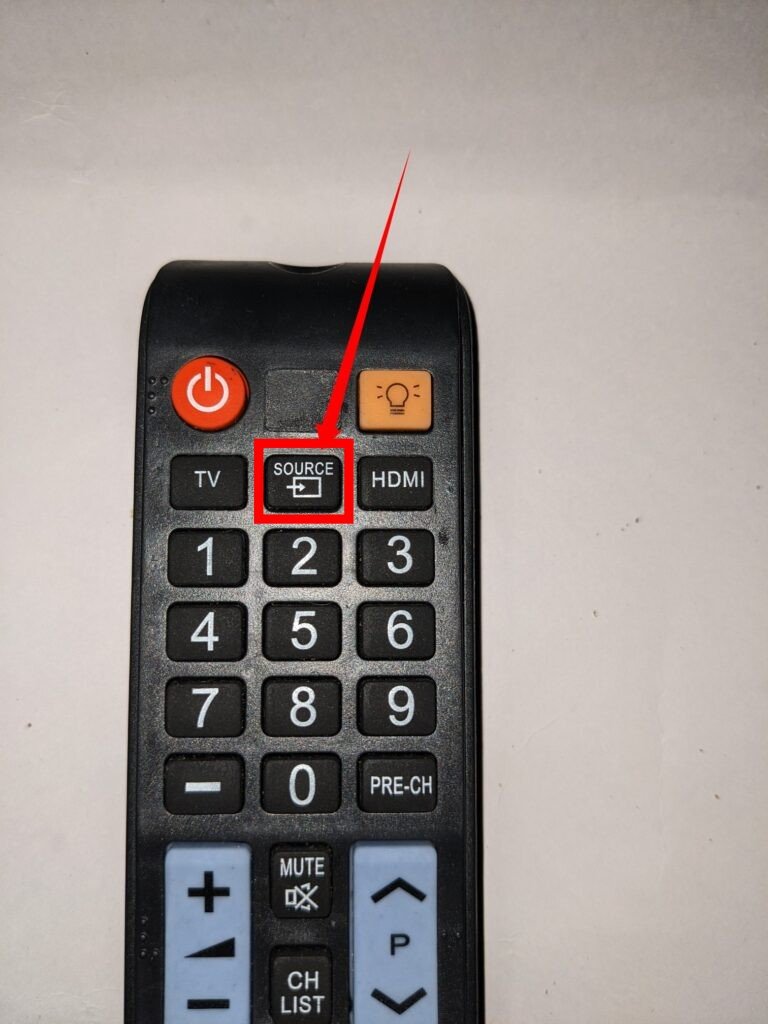
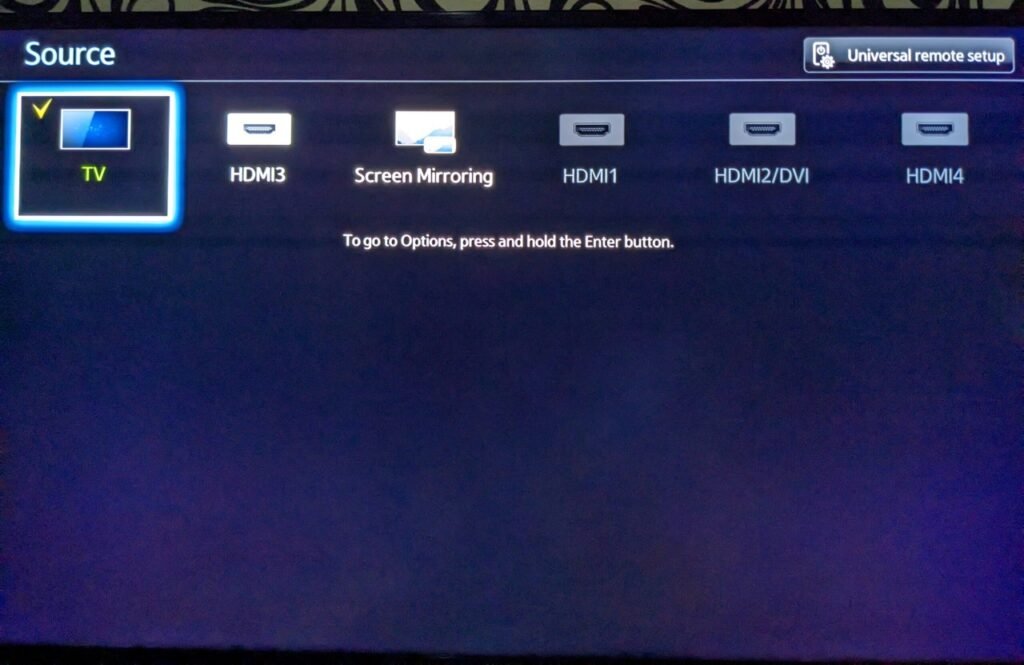
- Start by accessing the home menu on your TV and navigate to the source icon located on the left side.
- Connect the RF connector to the corresponding port at the back of your television.
- Select the channel scan option to initiate the scanning process.
If you have not connected an antenna, you may see a “No signal” message displayed on your screen.
To begin, select the source of the signal on your Samsung TV, choosing between air, cable, or both. If you are using an antenna, opt for the air option to test the available air channels.
Next, connect the coaxial cable to the antenna jack on your TV. Additionally, ensure that the AC adapter is plugged into a wall outlet to power the antenna, or connect the power source to the transmitter on the antenna itself.
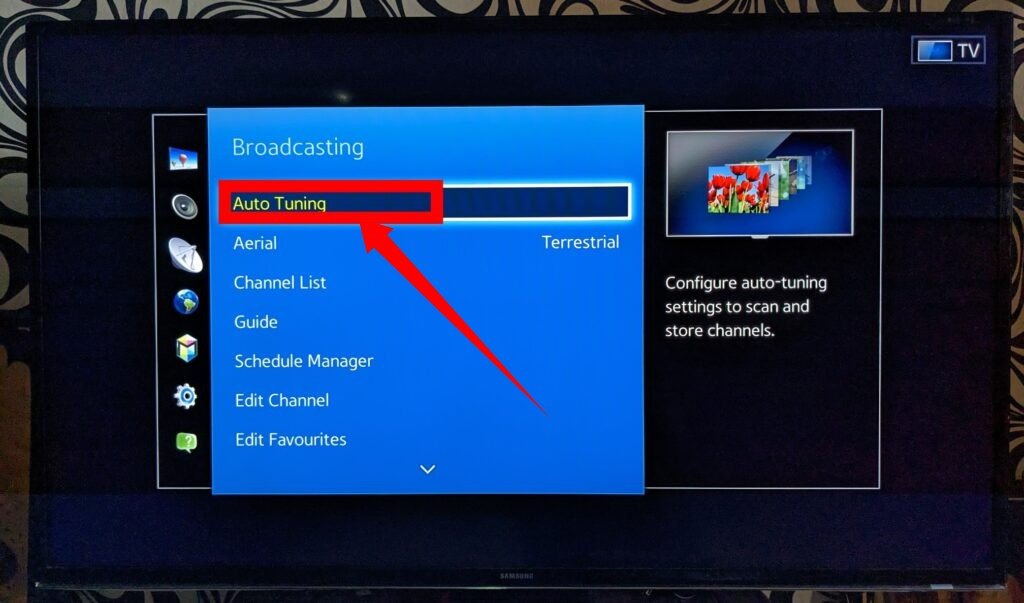
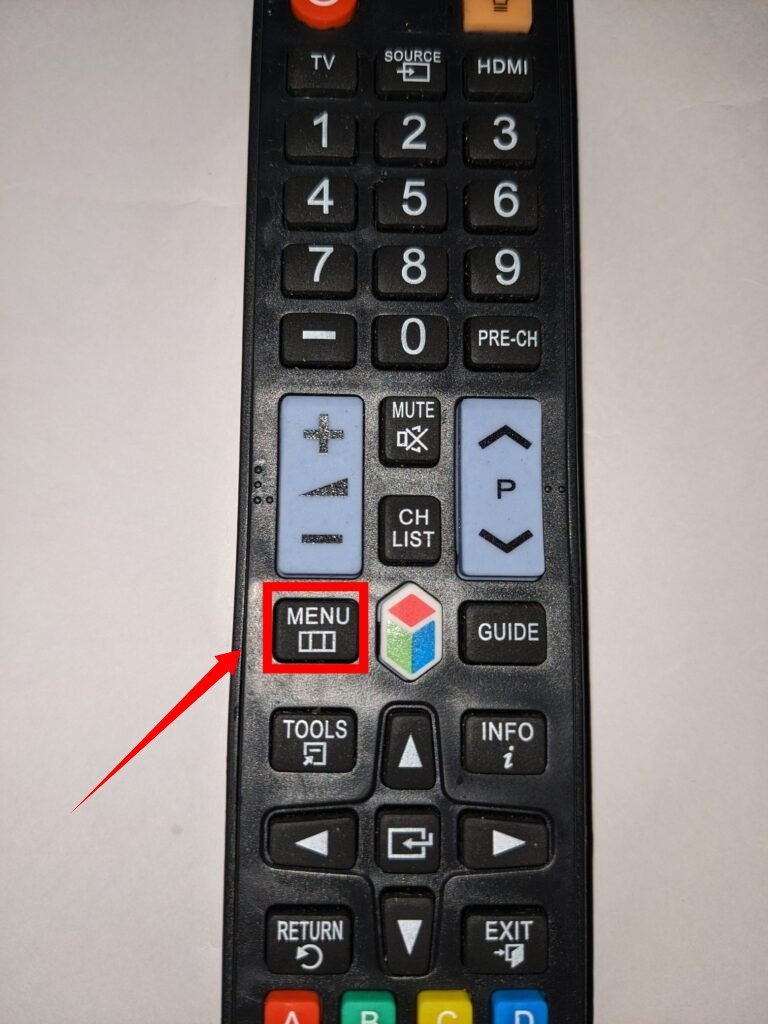
Navigate to the settings menu on your TV and select broadcasting, followed by auto-tuning. This will prepare the TV for scanning.

Initiate the scanning process by selecting the scan option. The TV will now scan and browse through the available channels in your area. This process typically takes approximately ten minutes.
Once the scan is complete, you can close the scanning window and begin checking the channels that have been detected.
Why Does Samsung TV Not Discover Local Channels?
If you are encountering difficulties in setting up local channels on your TV, here are some possible causes and immediate solutions:
1.Change the RF Cable Slot
It’s possible that you have connected your cable or antenna to the wrong slot on your TV. There are two slots available: ANT 1 IN (Air) and ANT 2 IN (Cable).
Ensure that you insert your cable or antenna into the correct slot. If it is currently connected to one slot, remove it and plug it into the other slot. Then, navigate to the channel discovery guide for step-by-step instructions.
Remember to select the appropriate input based on your setup. Choose “Air” if you are using an antenna, and select “Cable” if you are using a cable connection. To cover all possibilities, you can select both options to avoid any potential time wastage.
2. Restart Your TV
While it is rare, there may be instances where the scan on your Samsung TV experiences a glitch. In such cases, a simple restart of your TV can often resolve the issue. Here’s what you can do:
- Switch off your TV.
- Unplug the power cable from the outlet.
- Wait for approximately five minutes.
- Plug the power cable back into the outlet.
- Turn on your TV again.
In most cases, this restart should resolve any scanning issues you were encountering. However, if this method does not work, it suggests that there may be a more significant problem with your TV. In such situations, our third method, which we will discuss next, becomes the final option to explore.
3. Factory Reset Your Samsung Smart TV
The factory reset is the final option to consider, but it is important to note that performing a factory reset will result in the loss of personal settings on your Samsung TV. To ensure you can recover these settings later, we strongly advise creating a backup beforehand.
To proceed with the factory reset, follow these steps:
- Go to the settings menu on your TV.
- Navigate to the “General” option.
- Select “Reset” and enter your PIN if prompted.

- Confirm the reset by selecting “OK.” Please be aware that your TV will automatically restart after this step.
Keep in mind that the reset function may be unavailable if you are currently using an app on your TV.