
The Kraken series from NZXT has become synonymous with high-performance AIO cooling. For gamers, it might just be the high-performing equipment needed to keep your consoles cool and provide a better gaming experience. But is the NZXT Kraken M22 good for gaming? The answer would differ based on the user and their gaming needs.
Is NZXT Kraken M22 Good For Gaming – The Verdict
First, single fan AIOs generally perform worse than other air coolers at similar price points, and the M22 is rated as one of the worst 120mm AIOs available. For what it costs, you can get a high-end air cooler that competes with the X53, like an NH-D15.
120mm AIO is never a good idea for CPU cooling, especially if you’re a heavy user, and you’re better off with a tower air cooler or 240mm AiO. The Noctua NH-D15 has lots of great reviews.

The NZXT Kraken M22 isn’t All Bad
The Kraken M22 has a remarkable cooling capacity and great design, making it ideal for a small home cinema or compact gaming system. The inbuilt CAM software is appropriately designed to provide the needed cooling to your game console while in use.
For instance, you are dueling friends and other gamers worldwide over “Fortnite” or “Call of Duty” and do not need any issues with your console heating up; the Kraken M22 is that piece of equipment that could make all the difference.
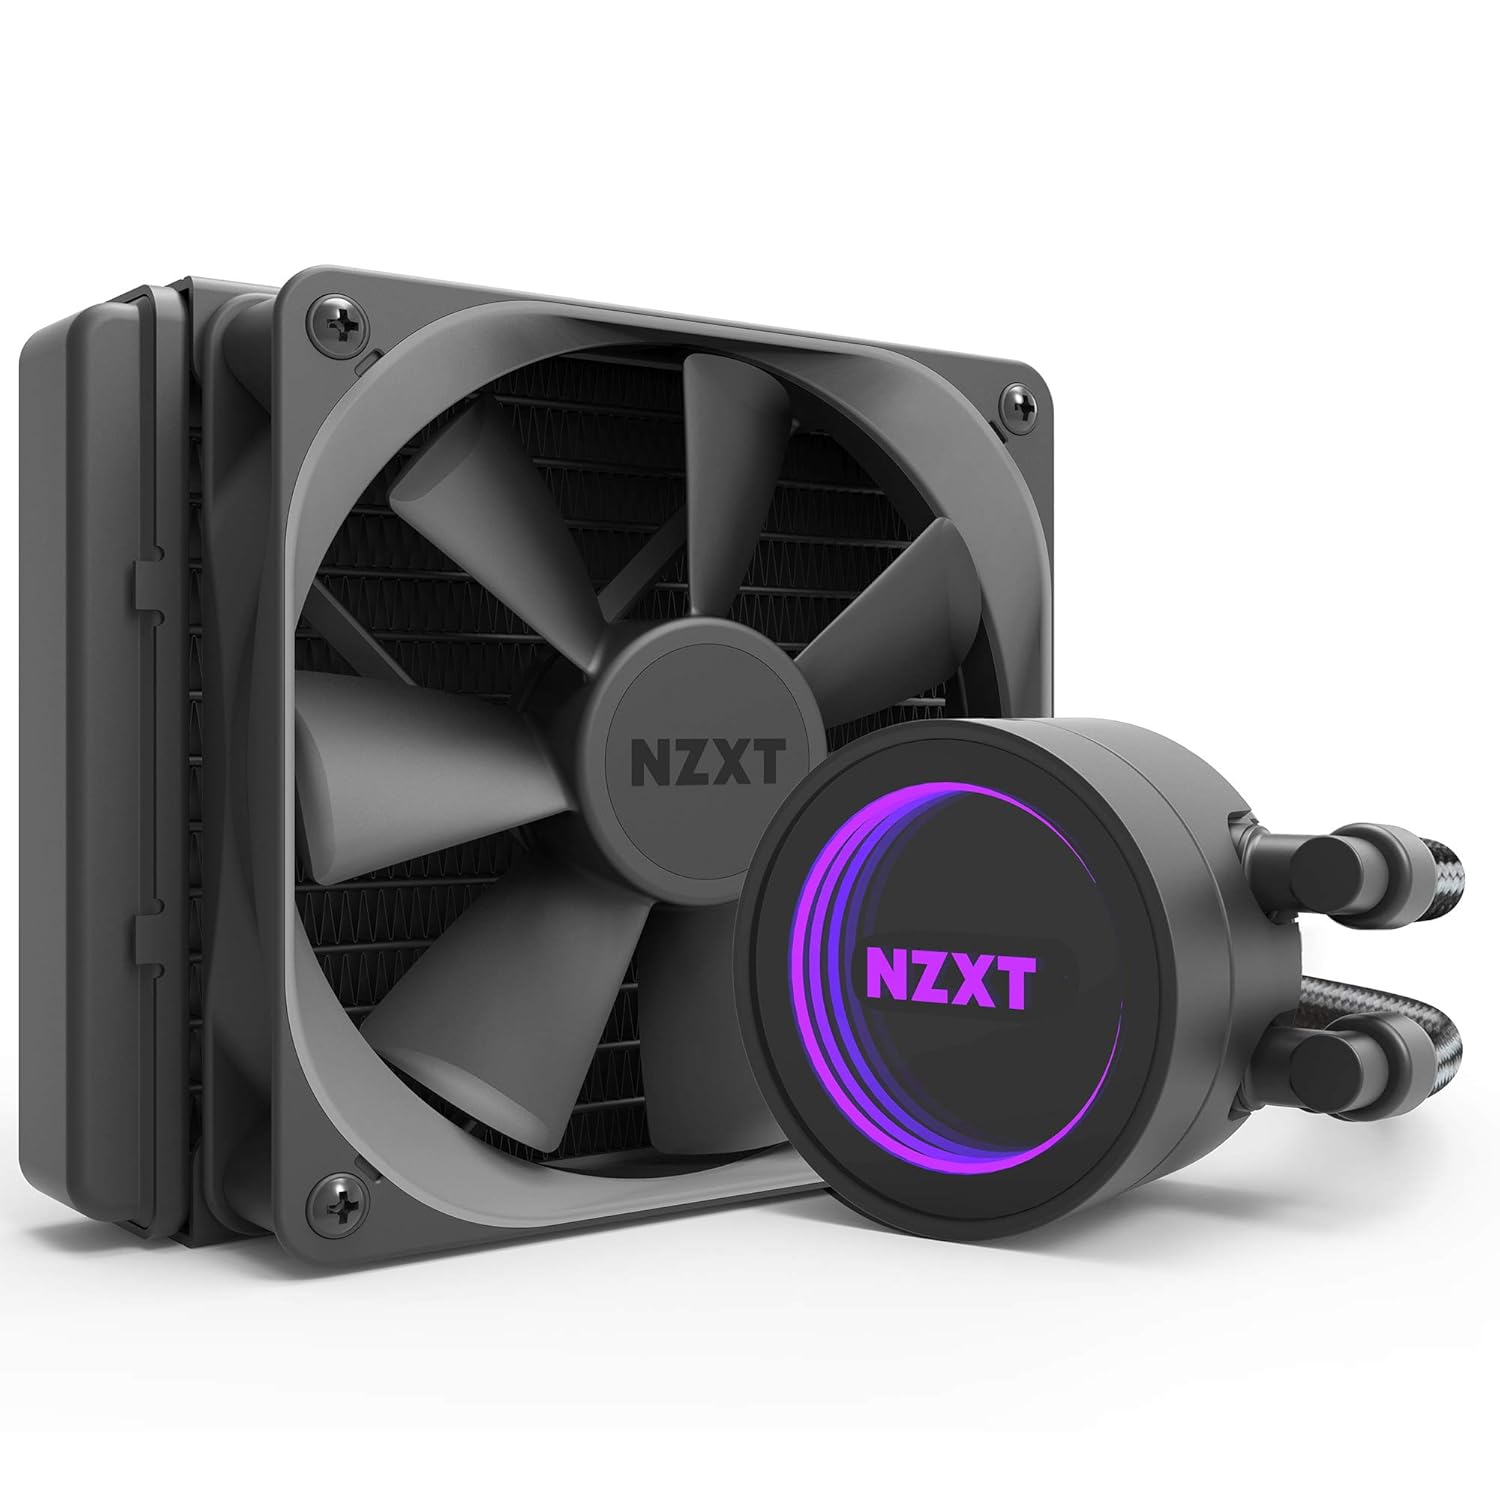
The M22 is globally known as a closed-loop liquid cooling solution that eliminates the need for expensive installs, leak testing, and coolant replenishing that standard water cooling solutions require. This cooling solution would ensure you can concentrate on playing your best hand rather than worrying about overusing the console.
It also includes a single 120mm NZXT Aer P120 fan with a 2000 RPM rating. While the fan’s design is elegant and attractive, it lacks RGB capability and illumination options.
NZXT Kraken M22 Specifications
Thickness 1.125″ (28.6mm) (2.25″ / 57.15mm w/fas)
Width 4.75″ (120.7mm)
Depth 6.15″ (156.1mm)
Pump Height 2.08″ (52.9mm)
Controller BIOS
Cooling Fans (1) 120 x 25mm
Connectors (1) 3-pin, (3) 4-Pin PWM, USB to 9-pin
Weight 47.6 ounces (1.350kg)
Intel Sockets 2066, 2011x, 1366, 115x
AMD Sockets AM2(+), AM3(+) AM4, FM1, FM2(+)
Warranty 6 years
Features
A Mini-B-USB-to-9-pin connection connects the cooling block port to the internal USB 2.0 motherboard header, allowing NZXT’s CAM program to control lighting settings.
The NZXT CAM program provides a user-friendly interface for controlling and monitoring your entire system, including additional components such as storage drives, graphics cards, and RAM. Still, it does not manage the pump speed of the cooler.
One can also switch each “gauge” readout to a timeline graph view in CAM. Illumination control, an RGB color picker, and multiple presentation options are available for configuring the LED lighting behind the infinity mirror more relaxed top, depending on how you want your M22 to look.
Software
Remember how CAM doesn’t control the M22’s pump flow and curve? That’s because the pump isn’t positioned on top of the CPU block like it usually is.
Instead, the radiator houses the Kraken M22’s pump, thanks to the NZXT. The PWM cable coming out of the heart of the 120mm aluminum heat exchanger gives us the proof we need.
You might think that this might interfere with the cooling fan’s airflow. However, there should be no airflow obstruction because the dead space below the fan hub center matches the pump position.
Top and bottom Exterior
The NZXT infinity mirror design on the top of the Kraken M22 block lives up to its name by being incredibly reflecting. Depending on lighting circumstances, you may not be able to view the customizable lighting effects above your CPU.
The Kraken M22’s bottom cooling plate is milled copper and a factory-applied thermal compound. The interchangeable mounting plates twist on and off along a fitting groove near the bottom of the cooling block.
USB Header Port
If the endless mirror bezel and lighted NZXT logo are facing outward toward you, the Mini-B USB header port is tucked away on what would be called the “top” of the cooler.
While this may appear to be a weird location, it makes perfect sense after installing the cooling unit because the connection can be routed beneath or beside the motherboard with other cables. Furthermore, putting the USB header close to the graphics card on motherboards with only one PCI-e slot could cause problems.
Because the Kraken M22 only employs one 120mm radiator, it has a minimal installation footprint, making it ideal for smaller form factors and home theater systems. The I/O ports on the cooling block exit at a 90-degree angle and swivel for tubing installation, but the I/O ports on the radiator are stationary.
Even having the cooler’s tubing protruding from one side of the cooler’s block, we saw no clearance concerns with memory DIMMs or other system hardware.
CPU Cooler Test Methodology
The bench described below is used to evaluate CPU coolers. Our methodology used a quieter bench with a passively cooled PSU and a 23% RPM 980 Ti blower fan for low system noise, ideal for gamers.
We are confident in the thermal testing process, which is among the best in the tech-media business. We’ve confirmed that this testing approach with thermal chambers demonstrated near-perfect accuracy of results.
Thermal testing necessitates precise temperature measurements in the surrounding environment. Ambient temperature was compensated for by using K-Type thermocouples and infrared readers to monitor temperatures continuously.
Two K-Type thermocouples are placed around the test bench, one (T1) above the bench and outside the airflow channels, and the other (T2) around 2-3″ in front of the cooler’s internal fan.
These two data points are averaged in a spreadsheet, yielding a T3 number that is subtracted from our AIDA64 CPU core tracking on a second-by-second basis.
Noise Testing
In terms of noise, the M22 produces 45.8dBA at 100% fan speeds, comparable to the X42 at 1700RPM, generating a total system noise of 48.6dBA.
The EVGA CLC 120 can maintain a lower noise level at maximum fan speed while keeping similar performance or much greater noise levels. That is entirely up to the user.
High-quality pump
The NZXT Kraken M22 pump, which spins at 3000RPM, pushes heat away from the processor. An infinity mirror design complements the built-in RGB LED for a trendy and appealing appearance.
Customize performance and RGB illumination with NZXT’s CAM PC monitoring program and setup tool.
High static pressure fan
The Kraken M22 uses a radiator-optimized AER P120 fan to circulate and cool the system at a maximum speed of 2000RPM and a total airflow volume of 73.11CFM.
Fan performance is improved by chamfered intake and exhaust design and winglet-tipped blades. The fan’s lifespan is extended by using a fluid dynamic bearing, reducing bearing noise.
The NZXT Kraken M22 120mm AIO CPU liquid cooler provides optimal processor cooling for high-performance systems built to overclock. It’s especially well-suited to gaming PCs with limited space for massive dual- or triple-fan radiators.
How to set-up NZXT Kraken M22
You should read the user handbook thoroughly before using your appliance. Follow all safety precautions, warnings, and the provided recommendations. Any NZXT product comes with a user manual, which should be given over with the product if sold or transferred.
Following the manufacturer’s usage instructions is a must to protect your health and property during use and acknowledge the manufacturer’s liability for probable flaws if you file a warranty claim.
- Take the backplate, put it through the pins, and then secure it with four screws on the backside.
- After preparing the backplate, align the nuts with the holes by shifting them into place. You can and should position the backplate precisely as shown above; it’s the only way to do it correctly.
- You should have already inserted your processor; the thermal paste is not required because the cooling block comes with TIM already applied.
- Install four standoff studs which will secure the entire block with spring-based screws once the backplate is in place.
- One piece of advice before installing the cooling block: organize your wiring.
- That USB connector, in particular, can be obstructed by anything like a heatsink. As a result, decide what angle you want your block to rest in, and I recommend that you plug in your wiring first and then seat it.
- Secure the four thumbscrews with the help of a screwdriver.
- Position the cooler, and you are almost ready for the first test run by tightening them until they can’t go any further.