
I have been observing Samsung’s dominance in the tech industry for quite some time now. One of my greatest focuses has been on Samsung’s cutting-edge TV. As a leading company in the tech industry, Samsung takes pride in creating a new model of TV every year.
If you happen to be a Samsung TV user dealing with the problem of a dark screen, please know that you are not alone. I have received numerous reports from users who have faced this issue in recent years. However, I am thrilled to share that with the right information in hand, this problem is easily fixable.
So, without any further ado, let’s dive right in and explore the fixes for your dark screen on Samsung TV.
Why is your Samsung TV Dark and What is the Solution?
1. Adjust Your Samsung TV Brightness
If you find your Samsung TV to be excessively dark or bright, the most common cause is often the picture settings. If you’re confident that the colors on your TV are accurate, but the brightness level is slightly off, I recommend starting by adjusting the following settings:
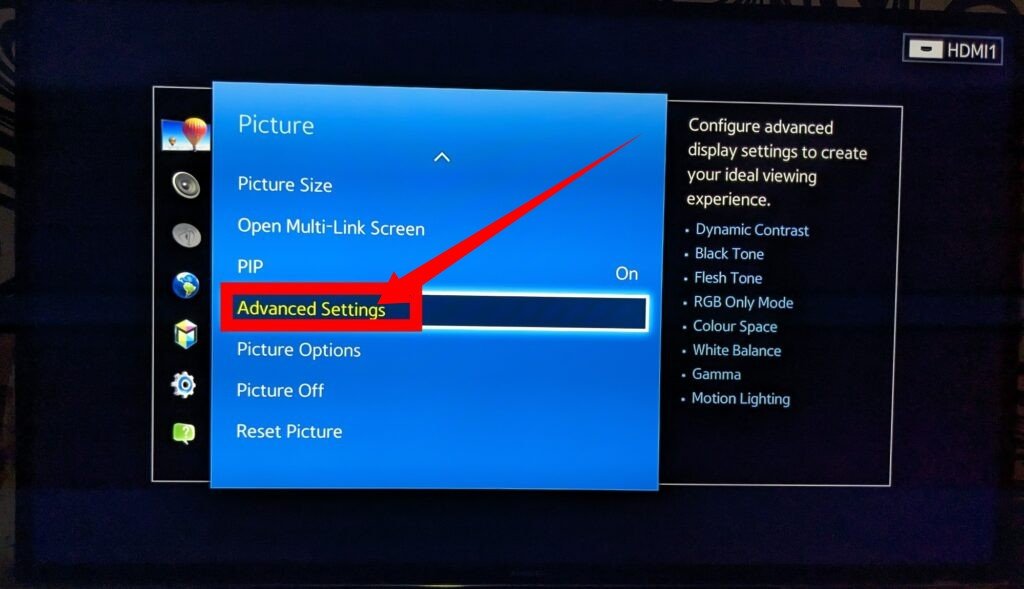
- Navigate to Settings on your TV.
- Select Picture.

- Choose Expert Settings.
- Locate the Contrast setting (please note that the optimal value may vary depending on your specific TV model, but typically a setting between 80 to 85 works well for most videos).

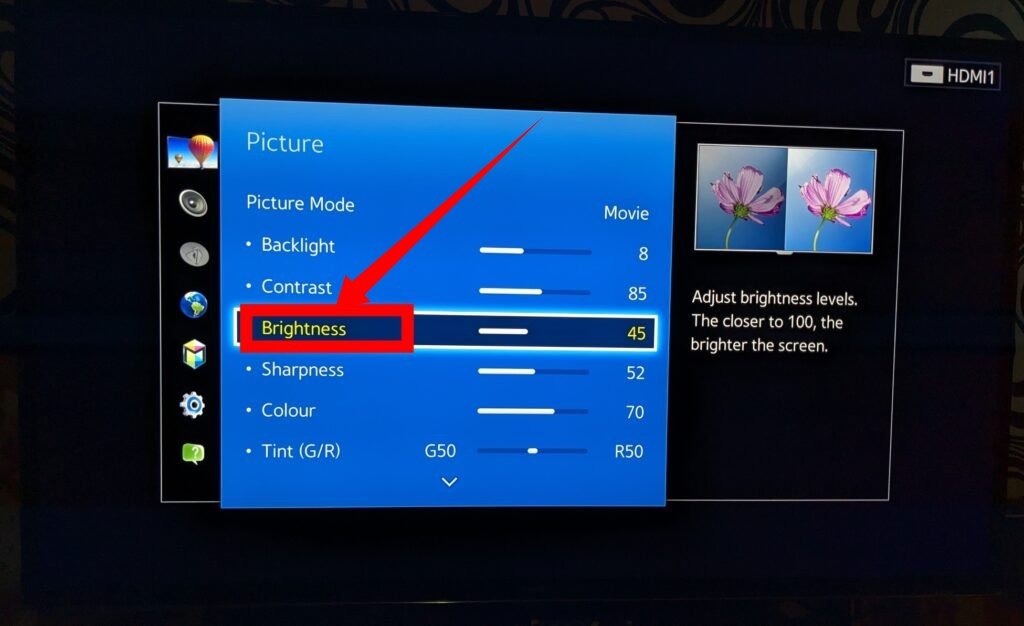
Navigate to the Settings menu, then select Picture followed by Expert Settings. Adjust the Brightness setting within the recommended range of 45 to 55, taking into consideration the specific model of your device.
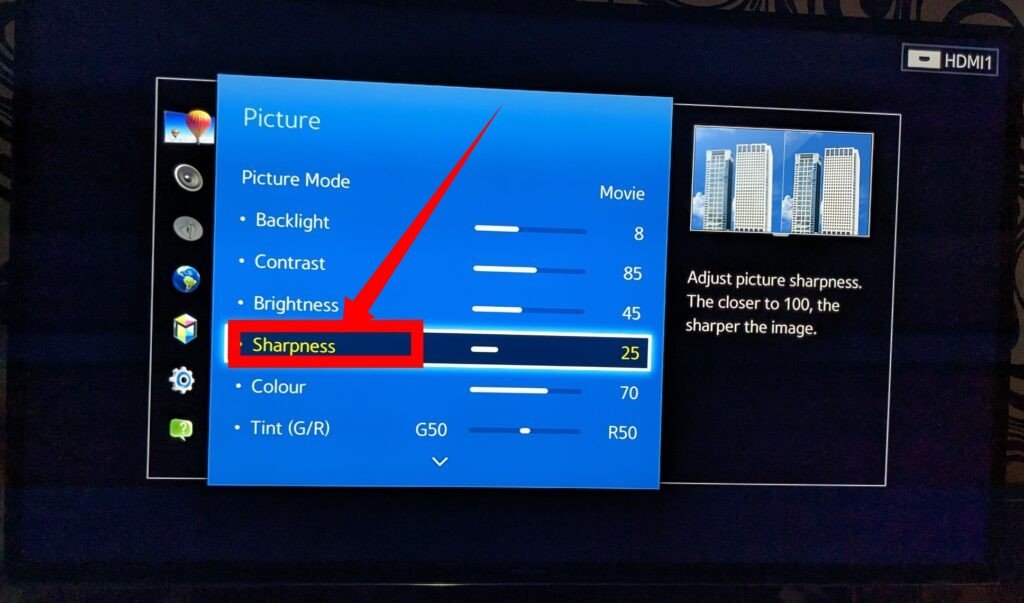
Next, proceed to the Settings menu again, choose Picture, and select Expert Settings. Ensure that the Sharpness setting is set at 25% or lower for optimal results.
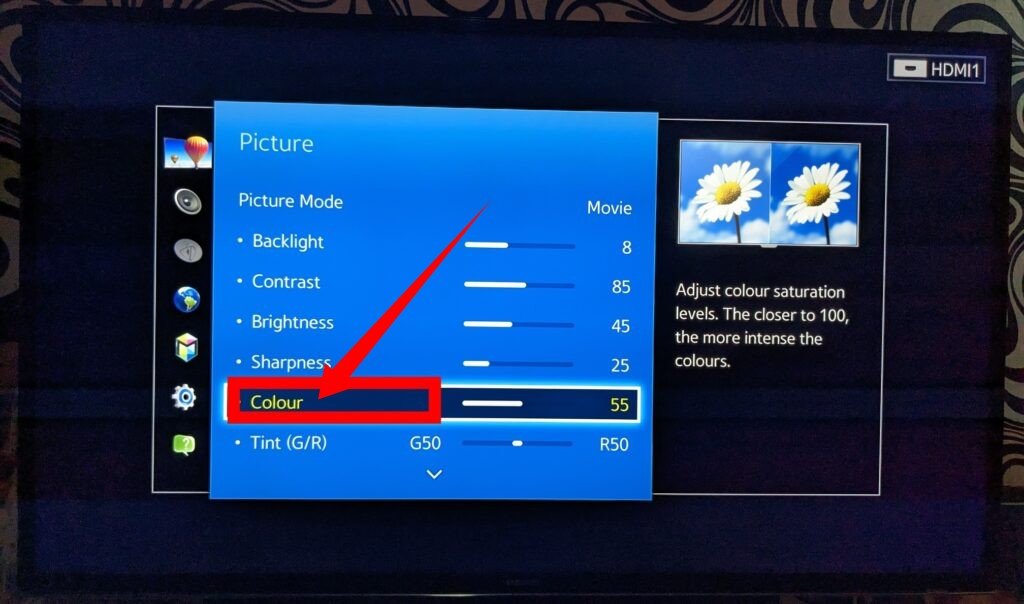
Now, return to the Settings menu once more, select Picture, and access Expert Settings. Adjust the Color setting within the suggested range of 45 to 55 for optimal display quality.
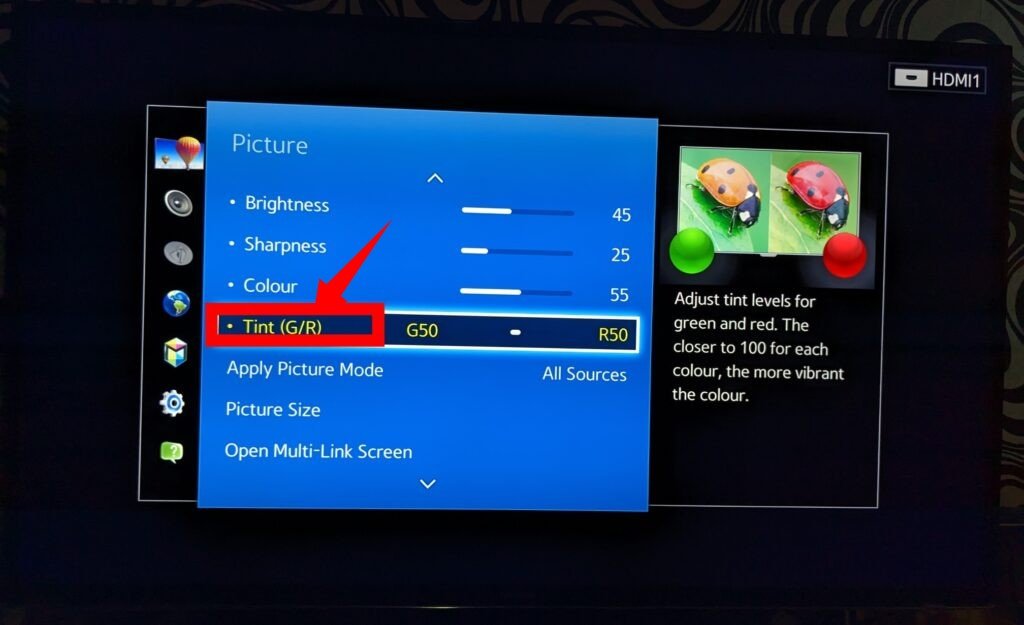
Lastly, within the Settings menu, select Picture, and navigate to Expert Settings. Set the Tint (G/R) value to 0, unless the input source exhibits an excessive green or red tint, in which case you may need to make minor adjustments accordingly.
2. Adjust Picture Settings on Your Android Box or Streaming Device
In the event that your TV is connected to an Android box or streaming device, we recommend attempting to adjust the resolution or picture settings directly from the Android box. Occasionally, inconsistencies between the resolutions of your TV and Android box can result in excessively bright or dark TV pictures. By ensuring that both devices have matching resolutions, you can mitigate such issues.
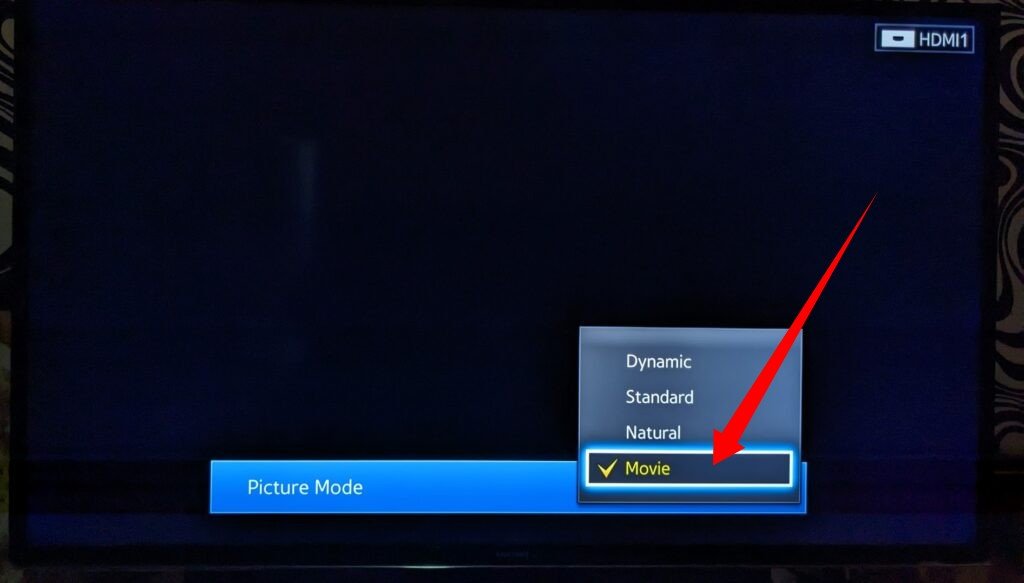
3. Picture mode
The Samsung TV’s picture mode can significantly affect the brightness of your display. It’s important to understand that not all picture modes are the same or serve the same purpose. Finding the appropriate mode for your specific needs will ensure the best TV viewing experience.
Here are some of the available picture mode options on Samsung TVs:
- Standard: This is the default picture mode that is generally suitable for most viewing environments. However, if your room is overly bright, this mode may result in a slightly darker picture.
- Dynamic: This mode provides a brighter picture. If you’re facing a dark screen, selecting this option can help improve visibility.
- Movie: Designed for watching movies in dark environments, this picture mode may appear excessively dark in well-lit rooms or for regular TV use.
- Natural: This mode aims to provide a comfortable viewing experience, particularly for extended periods of TV watching.

4. Backlight settings
By default, the backlight setting on your TV is typically set to a moderate level. However, if this setting doesn’t provide sufficient brightness for your viewing environment, the screen may appear relatively dark.
To address this issue, you can easily adjust the backlight setting by accessing the TV’s settings menu. Locate the backlight setting, which may also be labeled as brightness, depending on your specific model. Increase the backlight level until you achieve a satisfactory result, ensuring that the screen becomes brighter according to your preferences.
5. Watch in SDR
Contrary to popular belief regarding the choice between HDR and SDR, it is not always advisable to opt for HDR. While the HDR setting may offer visually striking results, there is no shame in switching to SDR (Standard Dynamic Range) for a brighter viewing experience.
It is important to note that HDR pictures often appear darker, which may not be preferable for all users. Therefore, switching to SDR is a viable option that can enhance brightness and cater to individual preferences. Remember, the goal is to prioritize a viewing experience that suits your personal taste and lighting conditions.
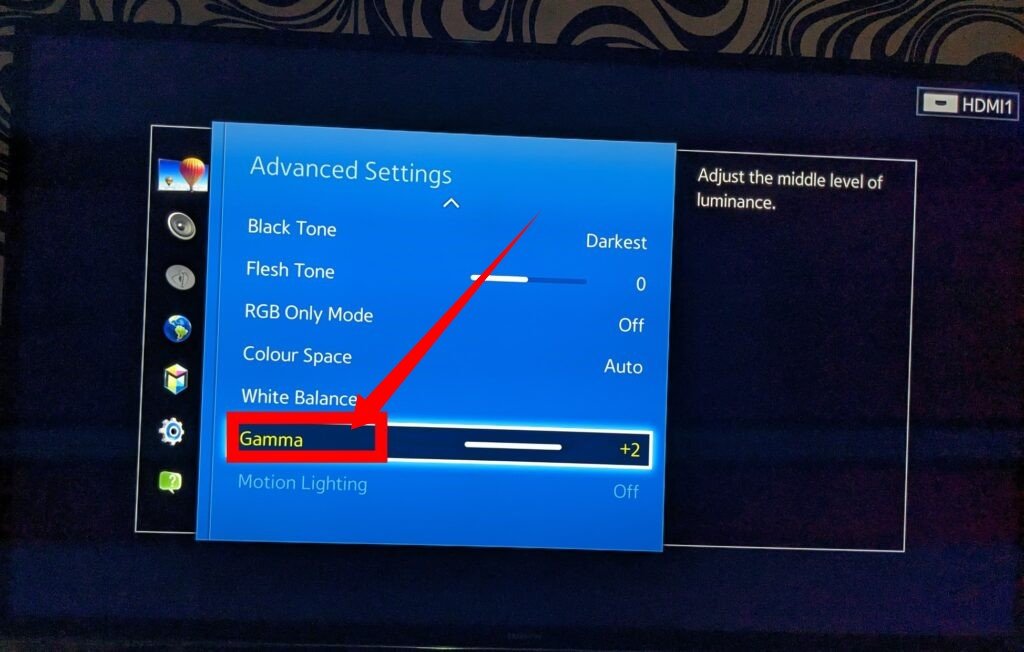
6. Changing Gamma
Each Samsung TV includes a specific Gamma setting that can be adjusted to customize the picture quality. By default, the gamma setting is typically preconfigured to 2.2. However, if you find that your screen appears darker than desired, you have the option to decrease the gamma setting by a few points, resulting in a brighter picture.
To make the picture appear brighter, locate the Gamma setting within the TV’s menu or picture settings. Lower the gamma setting by a few points to achieve the desired level of brightness. Experimenting with this adjustment allows you to optimize the picture quality according to your preferences and viewing environment.
7. Energy-saving mode
Many Samsung TVs come equipped with a built-in energy-saving mode designed to conserve power. However, this mode can have a downside, resulting in reduced brightness and picture quality.
If you notice the energy star logo displayed on your screen, you can improve the brightness by adjusting the picture mode. Simply navigate to the picture settings menu and switch from the energy-saving mode to the standard mode. This modification will help brighten up your screen and potentially enhance the overall picture quality.
By selecting the standard picture mode instead of the energy-saving mode, you can strike a balance between energy efficiency and picture brightness, ensuring a more visually pleasing experience on your Samsung TV.
8. Select the TV’s Home Mode
Samsung 4K TVs offer a feature called Home Mode, which you can access during the initial setup process. When prompted, you will have the option to choose between Home Mode and Retail/Store Demo Mode.
If your Samsung TV is currently set to Retail/Store Demo mode, the picture settings may not be optimized for home use. To adjust this setting, follow these steps:
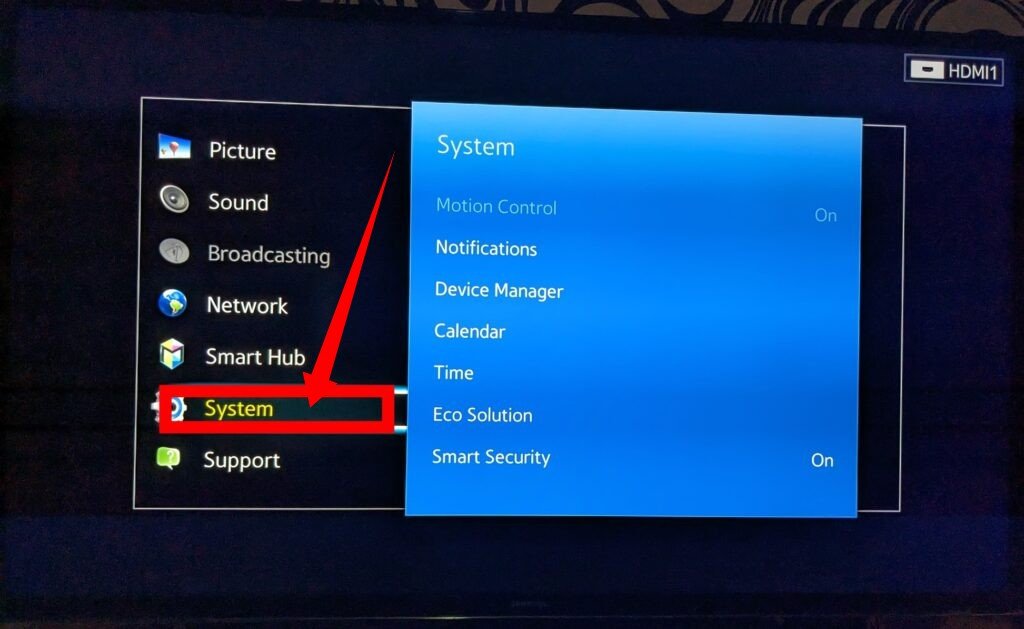
- On your Samsung TV, navigate to the Smart Hub.
- Select “Settings.”
- Choose “System.”
- Go to “Expert Settings.”
- Select “Usage Mode.”
- From the available options, choose “Home Mode.”
9. Turn Off Adaptive Brightness
Samsung TVs feature an adaptive brightness feature that automatically adjusts the backlight brightness based on ambient light levels. This is achieved through the use of ambient light sensors.
For Samsung TV models released in 2016 or older, follow these steps to adjust the settings:
- Access the System menu.

- Select Eco Solution.
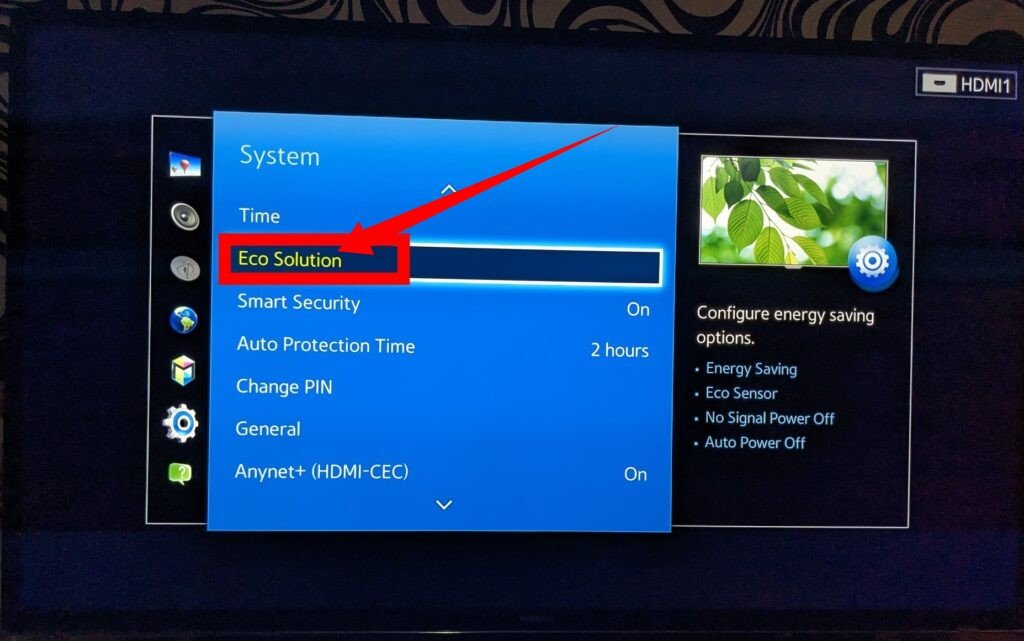
- Choose Eco Sensor.

- Set it to “off” to disable the adaptive brightness feature.
For Samsung TV models manufactured in 2017 or later, follow these steps:
- Go to the Settings menu.
- Select General.
- Find and select Ambient Light Detection.
- Use the slider to adjust the sensitivity of the ambient light detection feature. Moving it up or down will increase or decrease the effect of the adaptive brightness feature.
10. Worse Case Scenario – Damaged Backlight
Modern TVs can encounter issues with backlight LEDs or strips, leading to problems such as shadows or uneven lighting. If you notice that one or two backlight LEDs have malfunctioned, causing circuit breakage and resulting in visible shadows on one side of the screen, it is crucial to approach the situation with caution.
Repairing backlight LEDs is not typically a do-it-yourself (DIY) task unless you possess expertise or advanced technical skills. It is recommended to seek assistance from a professional TV technician or reach out to the manufacturer if your TV is still covered under warranty. Avoid turning on your TV until the issue is resolved, as powering it on in its current state could potentially damage the diffuser lens sheet and lead to further complications.